To change the Ndk version in Android Studio, go to the project’s build.gradle file and update the ndkVersion value to the desired version. Android Studio is a powerful integrated development environment (IDE) used by developers to create, test, and debug Android applications.
It provides various tools and features to streamline the development process. One of the important aspects of Android Studio is the ability to work with different versions of the Native Development Kit (NDK). The NDK is a set of tools that allows developers to implement parts of their app using native code languages such as C and C++.

By changing the NDK version in Android Studio, developers can ensure compatibility with different platforms and take advantage of updated features. This article will explain how to change the NDK version in Android Studio, providing a step-by-step guide for developers to follow.
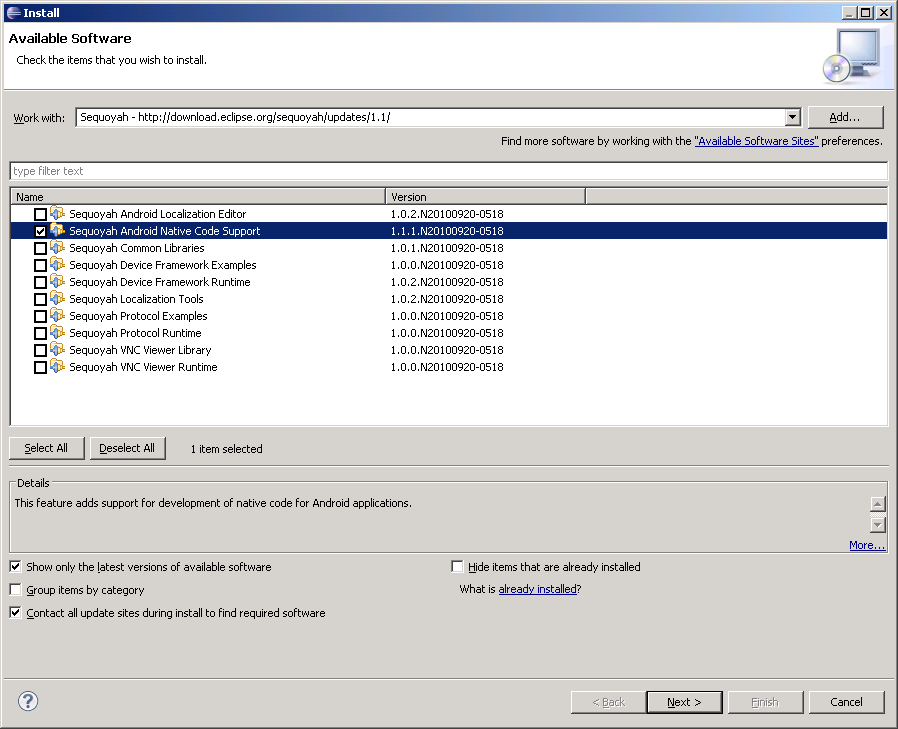
Credit: wiki.eclipse.org

Checking Current Ndk Version
When working with Android applications, it is essential to keep track of the NDK (Native Development Kit) version being used in your projects. The NDK allows developers to write parts of their application in native code languages such as C or C++, which can provide improved performance and low-level access to device features. In this section, we will explore how to check the current NDK version in Android Studio. This information will help you ensure that you are using the correct version and make any necessary updates or adjustments to your development environment.
Locating Ndk Version In Android Studio
Android Studio provides a straightforward way to check the current NDK version being used in your project. Here are the steps to locate the NDK version:
- Open your Android Studio project.
- Navigate to the File menu and select Project Structure.
- In the Project Structure window, click on the SDK Location tab.
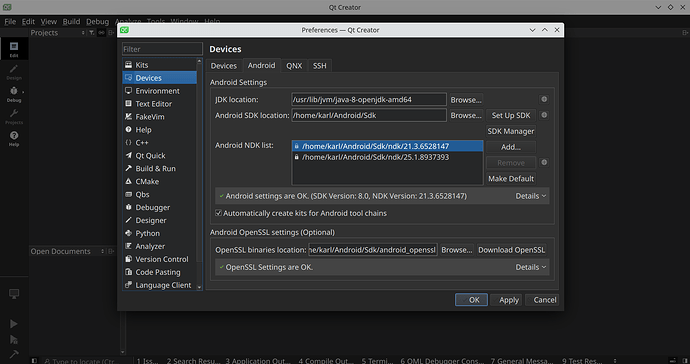
- Scroll down to the Android NDK location field. The NDK version will be displayed next to it.
- Make a note of the NDK version for future reference.
Alternative Methods To Check Ndk Version
If you prefer not to use Android Studio or simply want to double-check the NDK version using alternative methods, there are a couple of options available:
- Command-Line Interface (CLI): You can use the command-line interface on your computer to check the NDK version. Open the terminal or command prompt and navigate to your Android SDK directory. From there, run the command
sdkmanager --list. The NDK version will be listed among the available packages. - Using Gradle: Another way to check the NDK version is by examining your project’s Gradle files. Open your project in a text editor and locate the
build.gradlefile. Look for a line that starts withndkVersion. The NDK version will be specified after the=sign in that line.
By using these alternative methods, you can cross-verify the NDK version and ensure consistency across different environments.
Credit: developer.android.com
Changing Ndk Version
In Android development, the NDK (Native Development Kit) is an essential tool that allows us to incorporate native code into our Android applications. However, there may be occasions where you need to change the NDK version in Android Studio. This could be due to updates or compatibility issues with certain libraries or dependencies. In this article, we will explore two methods to update the NDK version: updating the local.properties file and using the SDK Manager to install a specific NDK version.
Updating Ndk Version In Local.properties File
In Android Studio, the local.properties file stores the information related to your Android SDK and NDK locations. To change the NDK version:
- Open the project in Android Studio.
- Locate the local.properties file in the root directory of your project.
- Open the file and find the line that specifies the NDK version (ndk.dir).
- Change the value of ndk.dir to the desired NDK version, making sure it matches the path to the NDK installation.
- Save the changes and rebuild your project.
Using Sdk Manager To Install Specific Ndk Version
An alternative method to change the NDK version is by using the Android SDK Manager:
- Launch Android Studio and go to “File” > “Settings” > “Appearance & Behavior” > “System Settings” > “Android SDK”.
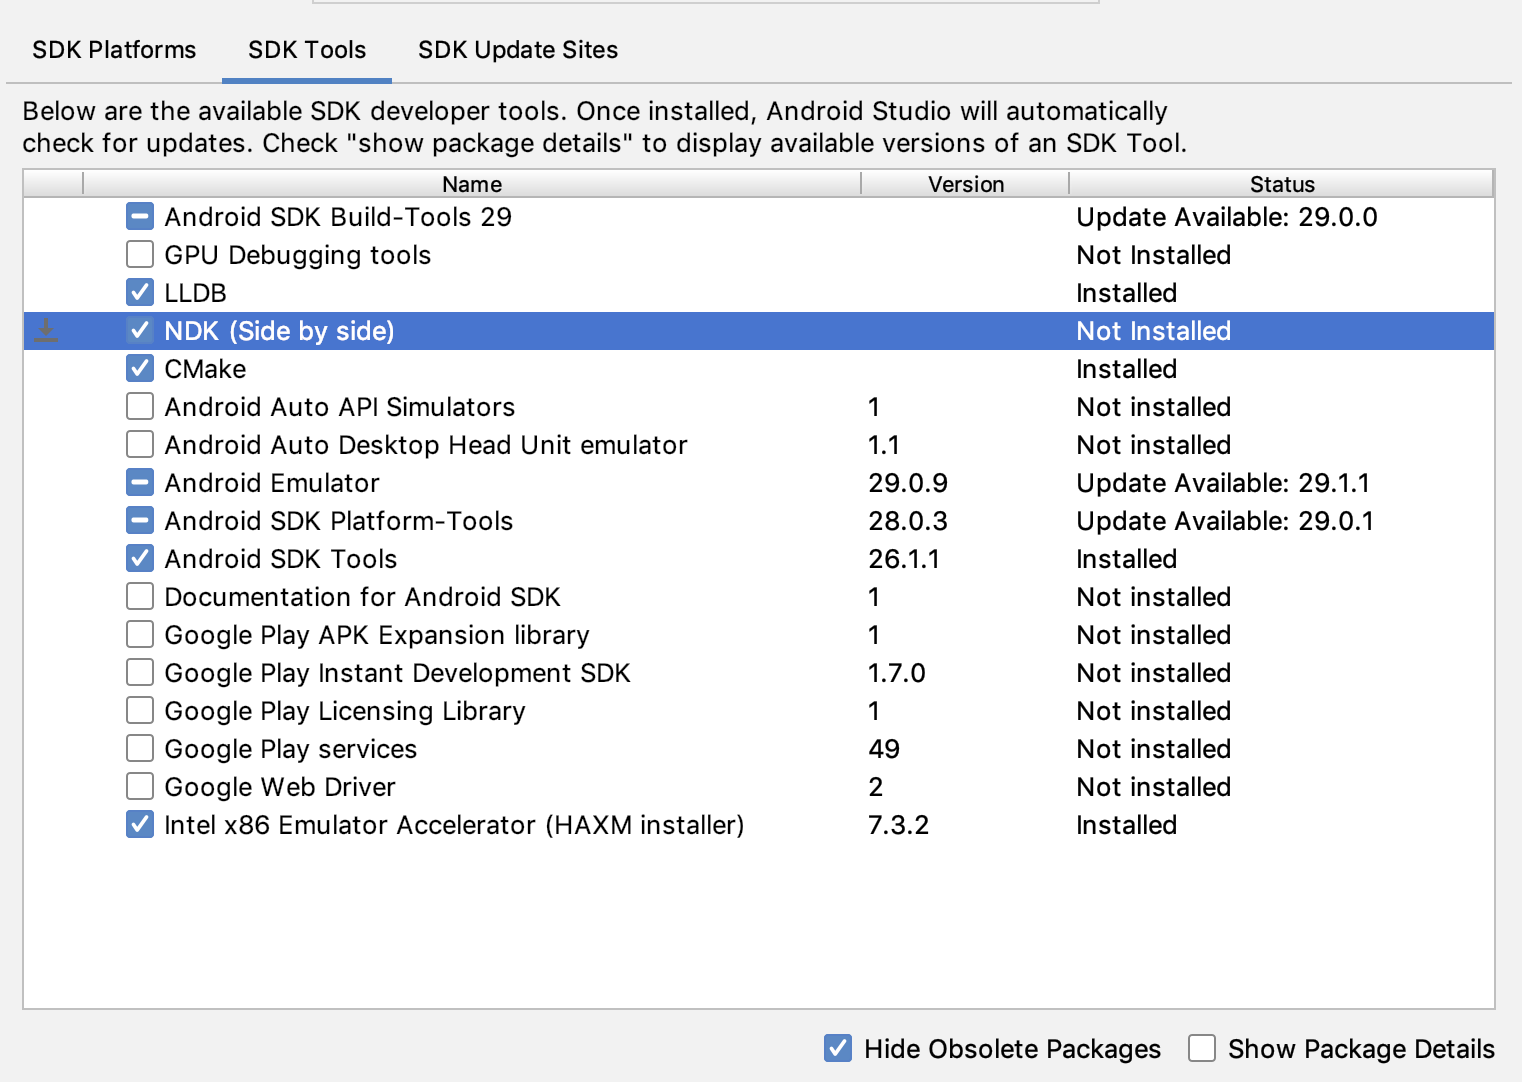
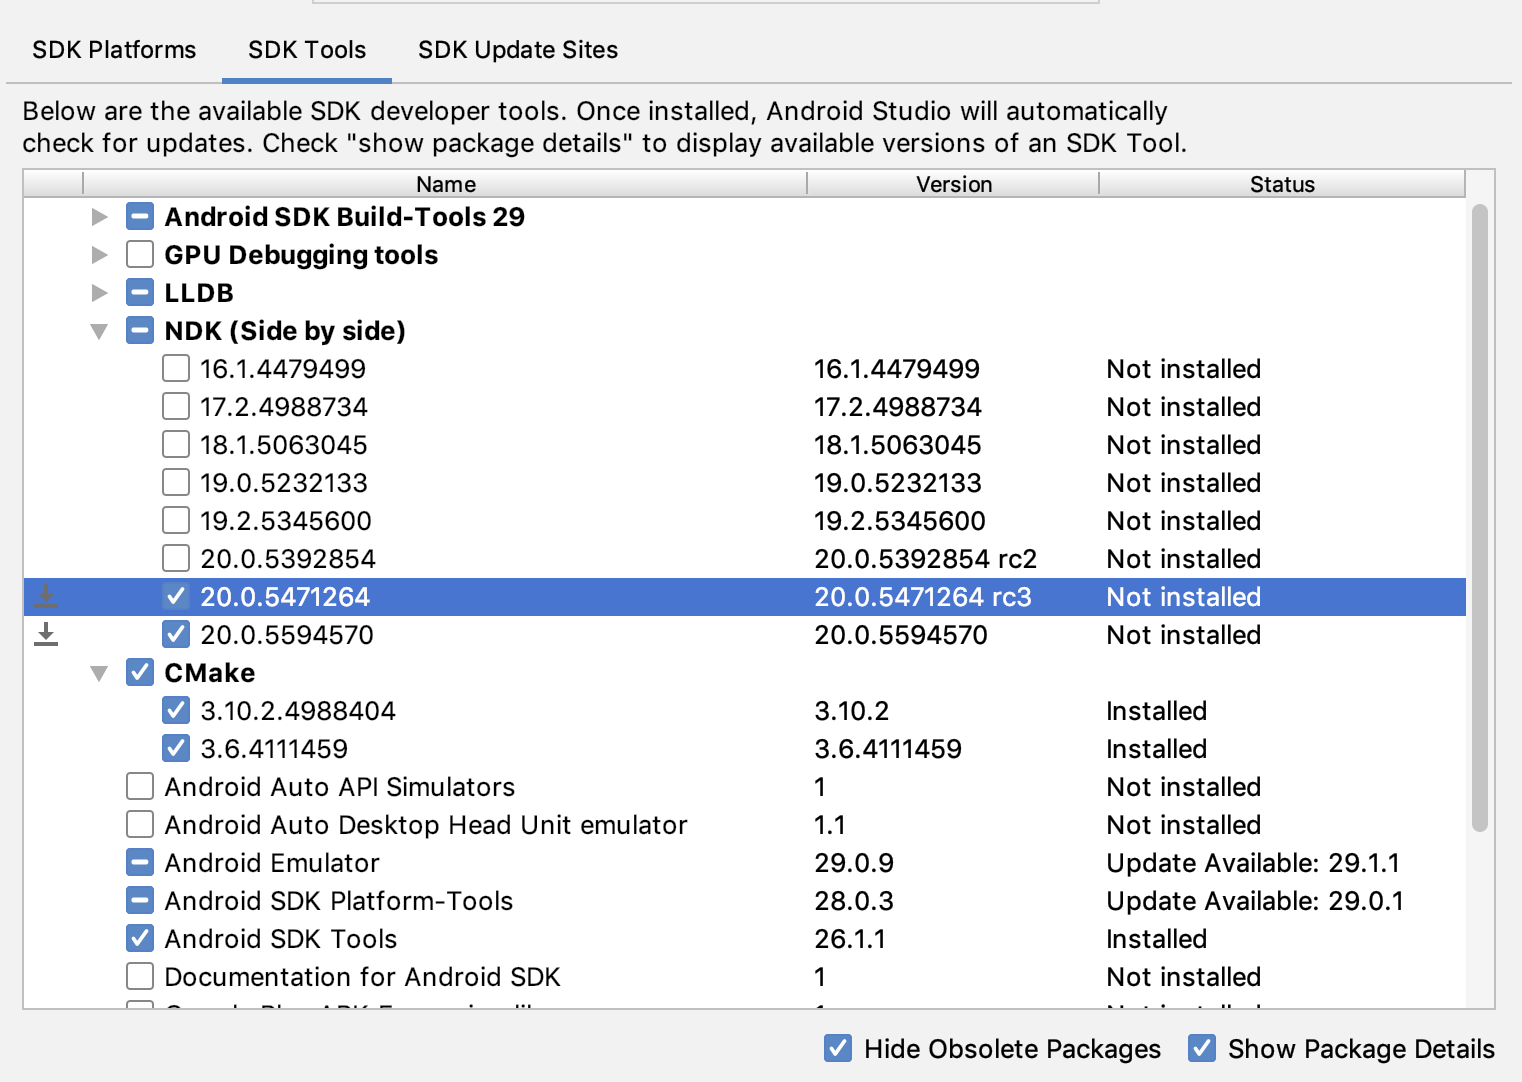
- In the SDK Platforms tab, click on the “Show Package Details” checkbox.
- Expand the Android version you are currently using.
- Scroll down to find “NDK (Side by side)”.
- Select the desired NDK version and click “Apply” to install it.
By following these steps, you can easily update the NDK version in Android Studio either by modifying the local.properties file or using the SDK Manager. This flexibility allows you to adapt your project to specific requirements and ensure compatibility with the necessary libraries and dependencies.
Testing The Changes
Learn how to easily change the NDK version in Android Studio with this step-by-step guide. Update your project’s NDK version to ensure compatibility and optimize your app’s performance.
In order to ensure that the changes made to the NDK version in your Android Studio project are working correctly, it is essential to test them thoroughly. Testing is a crucial step to verify that your application is still functioning as expected and that there are no compatibility issues with the new NDK version. This section will guide you through the necessary steps to test the changes effectively.
Building And Running The Project With The New Ndk Version
Once you have updated the NDK version in your Android Studio project, the next step is to build and run the project to see if it compiles and executes successfully. This process is vital to confirm that the new NDK version is compatible with your codebase and that there are no compile-time errors.
To build and run the project with the new NDK version:
- Open Android Studio and navigate to your project.
- Click on the “Build” menu at the top and select “Make Project” to compile your application.
- If the compilation is successful, click on the green play button to run the project on the selected device or emulator.
- Observe the application’s behavior and functionality to ensure that it works as expected.
If the project builds and runs without any issues, congratulations! You have successfully changed the NDK version in your Android Studio project. However, if you encounter any errors during the build process or notice any unexpected behavior in your application, you need to address these issues before proceeding further.
Handling Compatibility Issues
Changing the NDK version in your Android Studio project can sometimes lead to compatibility issues due to changes in the NDK APIs or deprecated features. It is essential to handle these issues to ensure the smooth functioning of your application. Here are some steps to handle compatibility issues:
- Check the official documentation of the new NDK version to identify any deprecated APIs or changes in behavior that might affect your code.
- Review the error messages and warnings generated during the build process to identify specific compatibility issues.
- Update your code to use the new APIs or replace deprecated ones, as recommended by the documentation or error messages.
- Rebuild and run the project again to verify if the compatibility issues have been resolved.
- If the issues persist, seek help from the online developer community or consult the official documentation of the NDK version for further assistance.
By following these steps, you can effectively handle compatibility issues that may arise as a result of changing the NDK version in your Android Studio project. Remember that diligent testing and addressing compatibility issues are crucial to ensuring the stability and performance of your application.
Credit: discuss.px4.io
Frequently Asked Questions For How To Change Ndk Version In Android Studio
How Do I Change Ndk Version In Android Studio?
To change the NDK version in Android Studio, follow these steps:
1. Open your project in Android Studio. 2. Go to File > Project Structure. 3. In the left panel, select the “Project” tab. 4. Under “Project SDK”, locate and select the desired NDK version from the dropdown. 5. Click “OK” to save the changes. 6. Android Studio will now use the selected NDK version for your project.
Conclusion
To sum up, changing the NDK version in Android Studio is a crucial process for developers. It allows them to optimize their applications and take advantage of new features. By following the steps mentioned in this blog post, you can seamlessly update the NDK version and enhance the performance of your Android apps.
Stay updated with the latest NDK versions and make the most out of your development journey. Happy coding!