To adjust air brakes, first, locate the brake chamber and its adjustment bolt. Then, turn the bolt clockwise to increase the braking force or counterclockwise to decrease it.
Adjustments should be made incrementally and tested after each adjustment. Air brakes play a crucial role in ensuring the safety and efficiency of heavy vehicles and have become a standard feature in modern vehicles. Properly adjusted air brakes are essential for the effective operation of trucks, buses, and other heavy-duty vehicles.

Adjusting air brakes is a relatively simple process that can be done by following a few steps. We will discuss how to adjust air brakes in a concise and easy-to-understand manner. By understanding the process and taking the necessary steps, you can ensure that your air brakes are working optimally and maintain the safety of yourself and others on the road. So let’s delve into the details of adjusting air brakes and the steps to take for a smooth and safe ride.

Credit: driveteam.com

Understanding Air Brakes
When it comes to operating a large vehicle such as a truck or a bus, understanding how the air brake system works is essential. Air brakes are a crucial safety feature designed to keep these vehicles under control, especially during emergencies. In this section, we will explore the fundamentals of air brakes, including how they work and the different components that make up an air brake system.
How Air Brakes Work
Before diving into the components of an air brake system, let’s first explore how air brakes actually work. Unlike traditional hydraulic brakes, which use fluid to transfer force from the brake pedal to the wheels, air brakes rely on compressed air as their operating medium. This compressed air is generated by an air compressor, which is typically powered by the vehicle’s engine.
When the driver presses the brake pedal, a series of valves and air lines open, allowing the compressed air to flow from the air tanks to the brake chambers located on each wheel of the vehicle. The brake chambers contain diaphragms that expand when exposed to the compressed air, pushing the brake shoes against the brake drums or discs, thus creating the necessary friction to slow down or stop the vehicle.
By varying the amount of air pressure delivered to the brake chambers, the driver can control the braking force applied to each wheel independently or simultaneously, depending on the vehicle’s brake design. Air brakes also have a built-in safety feature called the spring brake, which automatically engages the brakes if there is a loss of air pressure in the system to prevent the vehicle from rolling unintentionally.
Components Of An Air Brake System
An air brake system consists of several components working together to ensure efficient and reliable braking performance. Here are the key components:
- Air Compressor: This essential component generates compressed air and supplies it to the air tanks.
- Air Tanks: These storage tanks hold the compressed air and provide a reservoir for immediate braking action.
- Brake Pedal: This is the driver’s input device used to activate the braking system.
- Foot Valve: The foot valve controls the flow of air from the air tanks to the brake chambers when the driver presses the brake pedal.
- Brake Chambers: Located at each wheel, these chambers contain diaphragms that convert the compressed air into mechanical force to engage the brakes.
- Brake Drums/Discs: These are the rotating components against which the brake shoes or pads create friction to slow down or stop the vehicle.
- Valves and Air Lines: Various valves and air lines connect and control the flow of compressed air within the system, ensuring proper distribution and application of braking force.
Understanding these key components and their functions is crucial for adjusting air brakes properly. By knowing how each part interacts with others, you’ll be better equipped to diagnose and fix any issues that might arise.
Why Adjust Air Brakes?
Adjusting air brakes is essential to maintain their effectiveness and ensure safe driving. By following proper procedures, you can optimize brake performance and prevent potential accidents.
Why Adjust Air Brakes? Properly adjusting air brakes is crucial for maintaining the safety and performance of your vehicle. The air brakes in a vehicle are responsible for slowing down and stopping, making them an essential component of any commercial vehicle’s braking system. Ignoring the need for regular adjustments can lead to serious consequences, including reduced stopping power, increased stopping distances, and even brake failure.Importance Of Properly Adjusted Brakes
Having properly adjusted air brakes is vital because it ensures that your vehicle can come to a complete stop safely and efficiently. When your brakes are properly adjusted, they can effectively distribute the force needed to slow down or stop your vehicle. This not only improves the overall control and handling of your vehicle but also reduces the risk of accidents and potential damage to both your vehicle and others on the road. Properly adjusted air brakes also contribute to the longevity of your braking system. When brakes are not adjusted correctly, certain components, such as brake shoes, can wear unevenly, leading to premature damage and costly repairs. By regularly adjusting your air brakes, you can extend the lifespan of your brake components and save on maintenance expenses in the long run.Signs Of Maladjusted Brakes
Identifying signs of maladjusted air brakes is essential to prevent potential hazards on the road. Here are a few indicators that your air brakes may need adjustment: 1. Longer stopping distances: If you notice that your vehicle takes longer to come to a complete stop, it is likely an indication of improperly adjusted brakes. This can compromise your ability to respond quickly to sudden hazards or emergencies. 2. Excessive brake pedal travel: When your brake pedal sinks unusually far down towards the floor before engaging, it could mean that your brakes need adjustment. This increased pedal travel can affect your response time and compromise your safety. 3. Uneven brake wear: Inspecting your brake components regularly is crucial to detect any signs of uneven wear. If you notice that one brake pad or shoe has worn down more than the others, it is a clear sign that your brakes are maladjusted. 4. Warning lights or alarm activation: Modern vehicles are equipped with warning lights or alarms that indicate any issues with the braking system. If you see the brake system warning light illuminate on your dashboard or hear an alarm go off, it may indicate that your air brakes are not properly adjusted. By paying attention to these signs and promptly addressing any maladjustments, you can ensure that your braking system functions optimally, providing you with the safety and control you need while on the road. Remember, adjusting air brakes is not only a matter of compliance with regulations, but it is also crucial for your safety and the safety of others. Regular inspections and adjustments help prevent potential accidents, reduce the risks of costly repairs, and contribute to a smooth and controlled driving experience. So, make it a priority to keep your air brakes properly adjusted, and enjoy the peace of mind that comes with knowing your vehicle is equipped to handle any braking situation effectively.Step-by-step Guide To Adjusting Air Brakes
Looking to learn how to adjust air brakes? Our step-by-step guide provides a clear and concise overview to help you confidently navigate this important process. Follow these instructions to ensure your air brakes are properly adjusted for optimum performance.
Are you experiencing issues with your air brakes? It’s crucial to keep them properly adjusted to ensure safe and effective braking. In this step-by-step guide, we will walk you through the process of adjusting air brakes. Let’s get started!
Gathering The Necessary Tools
Before you begin the adjustment process, make sure you have all the required tools on hand. This will save you time and frustration later on. Here’s a list of the tools you will need:
- Adjustment wrench or pry bar
- Measuring tape
- Adjustment gauge
- Safety gloves
Performing Pre-adjustment Checks
Prior to adjusting the air brakes, it’s essential to perform some pre-adjustment checks. These checks will help identify any underlying issues and ensure that the brakes are in working condition. Follow these steps:
- Inspect the air brake system for any visible damage or leaks.
- Check the air pressure in the brake system. It should be within the recommended range.
- Test the parking brake to verify that it engages and disengages correctly.
- Measure the pushrod stroke using a measuring tape or adjustment gauge.
- Ensure the slack adjusters are in the proper position and not excessively worn or damaged.
Adjusting The Slack Adjusters
The next step is to adjust the slack adjusters, which control the brake shoe-to-drum clearance. Follow these steps to adjust the slack adjusters:
- Locate the slack adjuster on each brake chamber.
- Use an adjustment wrench or pry bar to turn the adjusting bolt.
- Rotate the slack adjuster in the appropriate direction to achieve the desired brake shoe-to-drum clearance.
- Check the pushrod stroke again to ensure it falls within the acceptable range.
- Repeat these steps for each slack adjuster in the brake system.
By following these step-by-step instructions and properly adjusting your air brakes, you can ensure optimal braking performance and safer journeys on the road.

Credit: www.facebook.com

Credit: www.mdpi.com
Frequently Asked Questions For How To Adjust Air Brakes
How Do Air Brakes Work?
Air brakes use compressed air to apply pressure to the brake pads, enabling them to stop the vehicle. When the brake pedal is pressed, air is released into the braking system, activating the brake chambers and pushing the brake shoes against the drums or rotors.
How Often Should I Adjust Air Brakes?
Air brakes should be adjusted regularly, typically every six months or as recommended by the vehicle manufacturer. It’s important to check for signs of brake shoe wear and adjust them as needed to maintain proper braking performance and ensure safety on the road.
What Are The Signs Of Air Brake Problems?
Signs of air brake problems include weak braking power, excessive noise, uneven braking, a spongy brake pedal, or a warning light illuminated on the dashboard. If you notice any of these signs, it’s crucial to have your air brake system inspected and repaired by a qualified professional.
Can I Adjust Air Brakes On My Own?
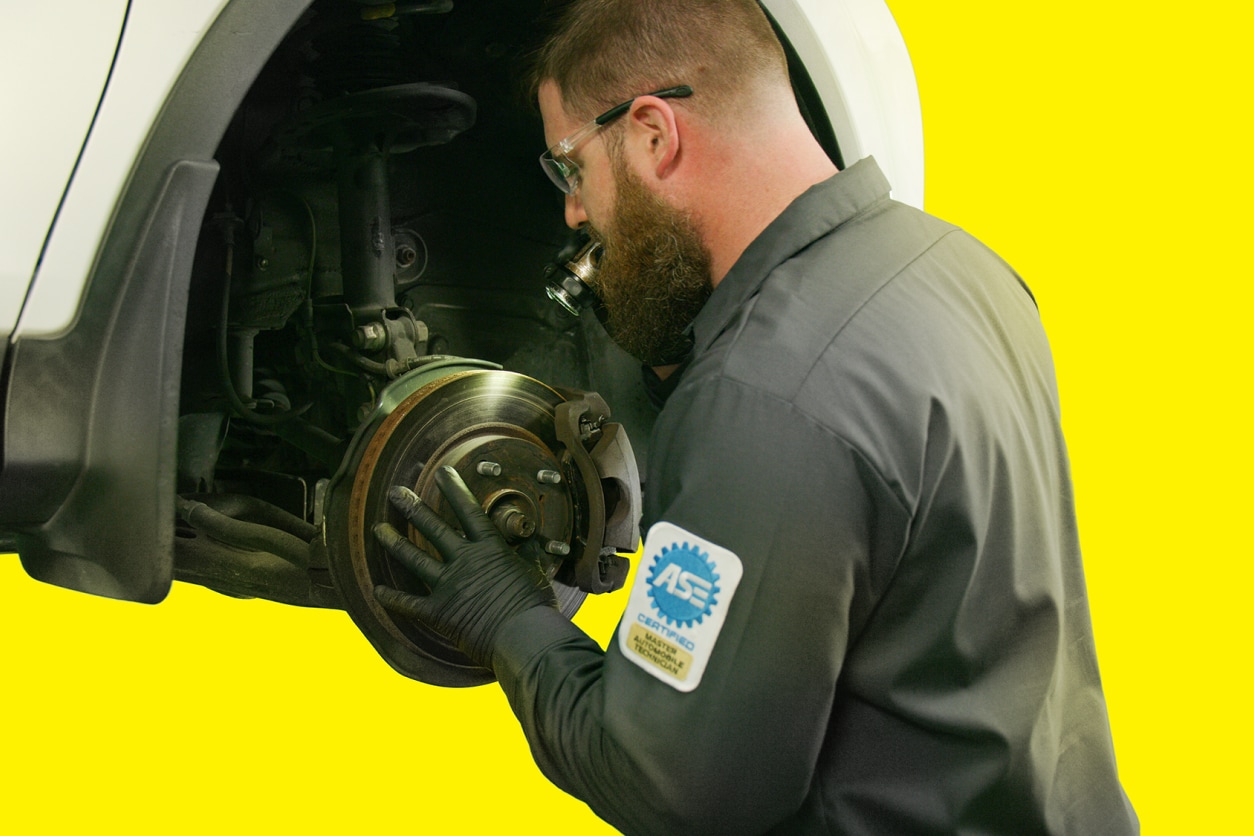
While it’s possible to adjust air brakes yourself, it’s recommended to have a qualified technician perform the adjustment. Adjusting air brakes requires specific knowledge and tools to ensure proper calibration and avoid potential safety hazards. It’s best to leave this task to professionals who specialize in brake system maintenance.
Conclusion
The proper adjustment of air brakes is crucial for the safe operation of any vehicle. By following the step-by-step instructions outlined in this blog post, you will be able to ensure that your air brakes are functioning optimally. Remember to regularly check and maintain your air brake system to prevent accidents and ensure a smooth driving experience.
Happy adjusting!